Translate

Tuesday, 15 September 2020

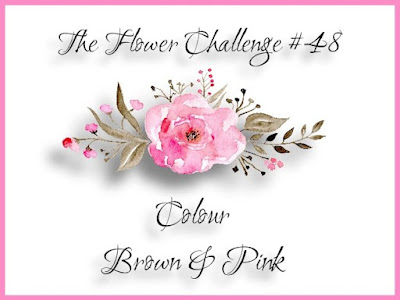
Reminder Post for The Flower Challenge Blog #48 Colour Brown & Pink


So its time for the reminder card for the challenge using Brown & Pink.
Again I have gone with pink for the flowers and brown for the leaves and vines.


This is another image from Bugaboo, I fell in love with this image the minute I saw it. I lightened the image in Photoshop this time and decided to make it long enough to use in a slimline card design.

You are looking at my first attempt at a slimline card. I have purchased a couple of different dies from a few companies trying to find ones that included different sized rectangles which is what I have used here. I loved that I could cut the rectangle full or the outline which is what I did with the pink layer.

The largest cut, the pink and white layer I have found that I cannot get a clean cut with my Big Shot because of the slight curve at the tops of the plates so I need to cut most of it, then take out of the Big Shot and move forward so the end will cut properly. I assume there are bigger (longer) plates that I can purchase but as I just bought 3 sets of plates on special I will make do. I do think it is disappointing the companies have done this as its expensive enough keeping up with the Joneses crafting wise anyway.


Anyway back to my card and this wonderful image. I coloured with copics this time going for very light pinks in the RV range. I can see myself using this image quite a bit more, makes me think of lace and delicate embroidery.


Finished off with a silver glitter diecut 'Happy Birthday.

Thank you so much for coming to look, now its time to go check out the rest of the Design Teams makes for this month at The Flower Challenge Blog


Crafty Hugs


Aileen


Saturday, 12 September 2020

Time For Another Post - A Few More Cards


I decided I wanted to do another card for the Pink & Brown Challenge at The Flower Challenge. This is another digital image from Bugaboo, I actually played around with it in Preview which is a program that comes on all computers (called that on my Mac). This allowed me to enlarge to the size I wanted and also to lighten the outlines as I only wanted to do a light colouring of it.

I wanted to do a very easy colouring with my copics no blending and going back over the image in two layers. I added the darkest colour  where I want the shadow, then I came in with the middle colour and pulled it out a bit more then the lightest of all adding here and there leaving white ares on the ends of the petals for highlight. I then did the same with my browns for the leaves.


I really love how this turned out and it took me all of 5 minutes to colour. I added shimmer to the flowers but you cant see it here. Cut down the image a bit so I could add to a dark brown base and have it show up. A few scattered gems and all done.


White embossed flower, I have had this stamp, Mondo Hydrangea  for so long and I just love it. Its from Ellen Hudson stamps.The main image was stamped and a few of the petals here and there. 


I then did some light watercolouring with my Zig Watercolour brushes and then went over some of the colours again to add some depth. Finished off with a die cut 'Magical'.


My last card is a layered stamp set from Altenew and I love how easy this was once I practiced a couple of times with the layers. I have used Altenew inks for the layers except the last.

I decided I wanted some embossing on the last layer so I clear stamped and added silver embossing powder. I cut the panel with my now most favourite rectangle die then added the layer to a pink and white striped pattern paper which is more like cardstock as it is quite thick.

Thats it three super easy cards, I hope you like what you have seen and come again soon.

Its nearly time for the reminder post for this months challenge over on The Flower Challenge , so if you like the idea of pink and brown go check it out and add a card or two.


Crafty Hugs


Aileen

Tuesday, 8 September 2020

A Few New Cards

 There's a new Challenge on Instagram and its called  #colorhuescolorchallenge
and the challenge is to use as many green and yellows as you can.


I love doing my scribble backgrounds and I used 9 green copic colours across the G; YG; and BG range all below the 00 numbers. Yellows for the flower approx 7 from the Y000 range up to Y19 A small amount of grey around the flower to give the illusion of  volume.


This flower is a digital image from gracielliedesign.com I love the image and the sentiments that come with it. I have enlarged to fill the card front and just managed to fit the sentiment in as well.


Next up are a couple of images from Mo's Digital Pencil (my favourite people drawer in the world)
I got to practice skin tones, hair and denim on this card. I added both images to the card front as though they are competing against each other. The sentiment comes with the images.

When I had finished I added a lot of pale brown in imitation of carpet for them to be sitting on. Used my new favourite rectangle die and then layered on a piece of cardstock I had blended three blue/green distress oxide on. This was then added to a white card base.


My third card, the images were sent to me by my very dear friend Therese who knows how much I love this one. I have coloured her exactly the same as I did last time as I love the colour mix and those wee little sequins that I added to her tutu on the shoulder and the bits of glitter pen. 

This time the  Big Day is a birthday card. I also added a layer of pink and gold foil pattern paper to the background making the card a bit bigger..I love how it turned out. 


Well thank you for stopping by and I hope you come visit again soon.

Crafty Hugs

Aileen


Friday, 4 September 2020

The Flower Challenge #48 Colour Brown & Pink


Love this for a challenge 'Brown and Pink' with flowers this is a wonderful combination. Remember it can be coloured or use coloured card stock but it must be Brown and Pink. Some neutrals are allowed.

Now we have a sponsor this month, Bugaboo and they are giving away Digital  Images as prizes this month. You get to pick whatever you want from their images within a set price range.

As most anyone who follows me knows I love playing with digital images. When you purchase the image it can be resized, you can use some of or all of the image and you can even soften the outline enough to do no line colouring. You can print onto Copic friendly paper and watercolour paper.
If you are techno savvy you can even change the colour of the outlines. You don't need to have the latest in drawing programs and a degree in IT.  Today I am using an image from Bugaboo Digital Images  

Also today we have LeeAnn Barrett joining us as Guest Designer and after you have checked everything out don't forget to go check out her amazing blog. Her cards are wonderful and she has been such an inspiration to me for many years.


In this instance I have enlarged the image to fill the whole length of the Copic cardstock and have not included the vase it comes in.  I will use the full image in another card.

Now this image is quite a heavy lined image but as you can see when coloured it truly shows the image off, perfectly. 

I was a bit obsessed at first with doing the outline in brown to go with my theme of sepia but my printer decided to start playing up. The basic print became a big over two weeks try to fix the bloody printer (kill, destroy, throw it down the driveway, rant keep calm Aileen, deep breathes Aileen, no you cant use the sledge hammer on the printer...........ok its all fixed now and has lovely new cartridges in it, yes I have calmed down.) But I gave up on trying for different coloured outlines and used what I had printed up in the first place.

I decided on using my browns for a sepia look to the flowers E41,42,43,44 and E49 for depth of shadow and my softest pinks for the background together with a couple of E's . R0000 R000 R01 RV000 RV00
E00 E01.
To achieve this background I just use my copic not the tip but tilted downward and I scribble here and there in one direct then in another always lightly all over, changing colours and going to new spots, over some just until I feel confident I have achieved the look I want. I love this way of colouring as it gives a light background that I don't have to worry is even and not patchy I think its a rather ethereal look to it and I also find I don't have to worry so much about getting the coloured image damaged.

I finished off by adding white gel pen dots randomly placed as well as on the butterflies and flower centres and then a couple of pink sparkles.

O decided on a dark brown card base which is slightly larger than the coloured images. 

Now it's time to go see what the rest of the wonderful Design Team have done with their floral images from Bugaboo. I tell you what these girls are amazing, as are their cards.


Thanks so much for coming to visit and I hope you come back again soon.

Crafty Hugs
Aileen