Translate

Thursday 29 October 2020

Merry Christmas & Dear Santa


And the roll is on, the production line is moving. I had three orders arrive this week. One of them being from three months ago. They are all wonderful stamps and companies and cant blame anyone other than Covid and what its doing to the world.

The hardest thing I had to do was look at these wonderful items, caress them then put them away so I cant see them as I work through being good this year. Christmas cards will get sent out and they need to go soon I think. I'd rather someone had my card on display and enjoyed it for more than a month than for it to arrive Christmas Eve and packed away the next day lol.


Anyhooo check out this beauty, even though the photography is not so crash hot you can see its a beautiful elegant card and so easy to do. I die cut these large Tim Holtz Stunning Snowflake Die 
There are two in the set and even in Australia at $29.00 worth every cent. They cut perfectly with little effort. I saw a card with the same layout of silver with the sparkle silver in the centre and loved the look so went for it.

I also cut from mirror cardstock in Bronze, Gold, Pink, Purple, Blue and as much glitter cardstock as I could find then I also did in white in case I wanted to layer up.

I used a very elegant black cardstock that has a leather look to its surface and it looks amazing with the silver snowflake. You end up using one snowflake to layer the other.
The Merry Christmas is a wood one and I stamped with the clear ink pad then added silver embossing powder, twice. Cooked perfectly.

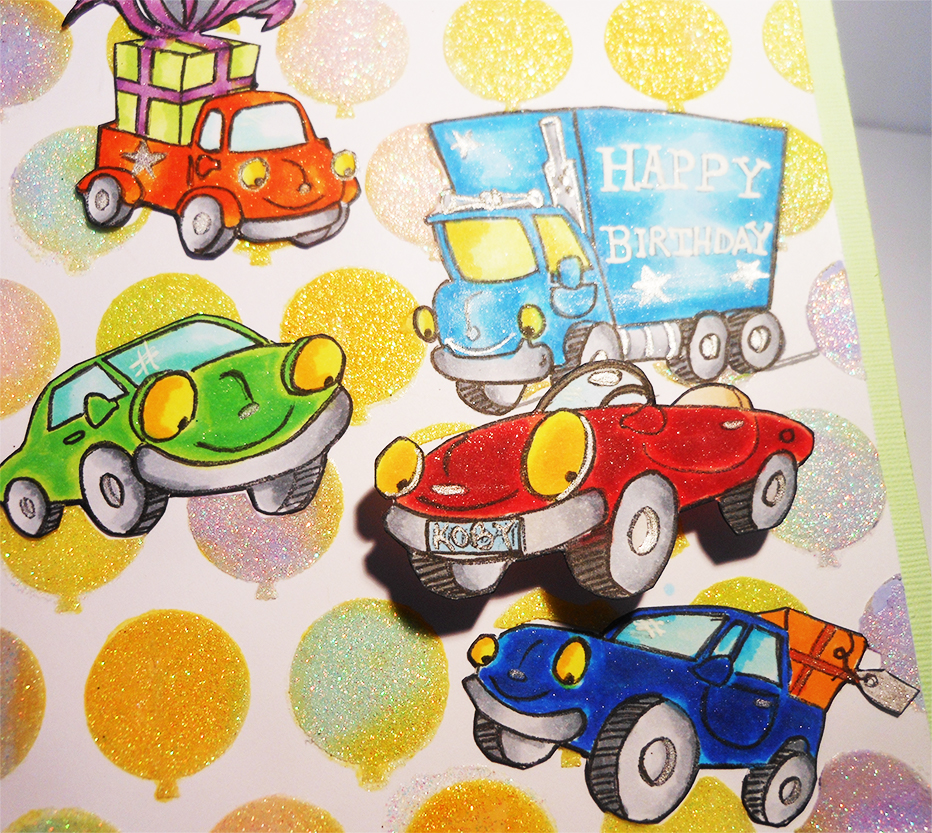
My husband loved it and suggested I make piles of them for everyone. I smiled gently and just drifted off to my pile of coloured images and backgrounds more determined than ever to use them all.


This cheeeky little missy is another of Mo's Digital Pencil images and is known as 'Coal'. Just check out that face and the cheeky little bit of butt on show. I didnt used the sentiment that came with it.

Thought you might enjoy a close up of that cheeky face.

I used the sentiment from  MFT Christmas set as I felt that rather suited her as well.
I added depth to the card front with a little bit of blended Distress Oxide' Black'
Some glitter cardstock behind the sentiment and a few gold stars.

Coal was coloured with Copics.

I Hope you enjoyed your visit and you come again soon.

Crafty Hugs


Aileen


Tuesday 27 October 2020

Merry Christmas Poinsettia Watercolour


Its time to start inundating you with finished Christmas cards. I coloured my way through last year and actually have to try and stop myself using the stamps I ordered last Christmas to make more as I need to finish up cards and send them out.
I got all the backgrounds, die cuts, stamped, coloured, heat embossed backgrounds and images together and at first I just sat there staring at it all and thinking ohhh my goodness where to start.

The next thing I did was to sort them into some sort of order then put it all on the dinning room table that is opened to its full extent. No puzzles for a while and time to get moving on them.
Trying to resist looking at all the new ideas and styles and just pushing myself to like what I see and use it.


This is one of those amazing background stamps from The Ton stamped and gold embossed on multi media cardstock. Coloured with Zigs and water and of course there is sparkle added which you can see if you click on this image.
I trimmed the image and added to a bright green cardstock. I then added the big 'Merry Christmas" sentiment.


Thats it for today, because Scott asked if he too could do some Christmas cards. So setting him up and teaching die cutting, colouring, assembly using double sided tape and glue for those wonderful sparkly die cuts and sentiments is a bit slower than at first anticipated but we are both on our way now.

See you soon with lots more.

Crafty hugs


Aileen

Friday 23 October 2020

Mason's Birthday & Another Floral Card


Mason is grandson number three and it was his  6th birthday two days before Koby's 2nd
but we didnt get to see him because of Covid restrictions. We will catch up tomorrow.
This is his card, a lover of all things Lego so I went with Benny from Lego 2.

Lucky for me they had colouring pages at the official website for the movie. I picked this one and decided to stay with the traditional colours with the lego blocks.. Coloured with copics.

I then added die cut letters for his name 'Mason' . Benny was part of the image so I stamped underneath 'just wanted to say' and then added the next die cut 'Happy Birthday'

I think he will like the card and I know he will love the Lego gift.


And now for my next floral


I think I have combined my two favourite companies here. Statement Flower stamp Altenew

and The Ton Geometric Circles Plate I have coloured the flowers with Copics this time going with the yellows. Afterit was finished I fussy cut them and added to the front of the card with dimensional foam tape.

I decided to go with a dark brown card base but to add a little sparkle I have heat embossed around the edges with Copper Ebossing powder. Added the white die cut then the florals on that with a small number of bronze sparkle gems.

Another two cards done and I really need to get onto those Christmas ones that will need to be posted off to friends overseas sooner than later with the delays we are experiencing.

Thank you so much for coming to visit and I hope you come again soon.


Crafty Hugs


Aileen


Thursday 22 October 2020

Rainbow Cake & Fabulous

 I have made another card using some embossed vellum.


This is another stamp from Colorado Crafty Company  , another of their large background stamps. It's so easy to colour and has great sentiments. I stuffed up when I added the sentiment to this piece and had to fold over the back of the card and added a sentiment I had already stamped from another company.

I stamped and heat embossed in white and when I added the sentiment I didn't take into account the size of the piece of vellum so unless I wanted a card to be A4 size, I had to cover over part of it with the added sentiment on sparkly pink fun foam.

I used my Zigs, no water and just lightened each layer with a very pale colour.
The icing between each layer and icing on top I did in a pale pink that does show up
when you look at the card but doesn't here so you will just have to believe me on that.


Sprinkles on top of the cake and cake crumbs are all the colours used.
I added this to a bright pink cardstock, then added the sentiment and different
size enamel dots.

This next card is the other that I shared on Instagram but forgot to share here so 
here we go.

I think this one is my favourite so far on the vellum, this stamp is just perfect
for use on vellum. The stamp is from Simon Says Sketched Flowers .

With the close up I am trying to share the sparkle of the blooms but it looks like loose embossing powder, trust me it's not. There is lots of sparkle.

Attached to a white cardbase, added the 'fabulous' die cut sentiment and sparkly gems here and there.


So thats another two vellum embossed cards for you. I hope you enjoy seeing them and look forward to you commenting on the cards and hope you will visit again soon.


Crafty Hugs

Aileen


Tuesday 20 October 2020

Colorado Big Bloom Card & The Ton Big Flower Background Card

 I am so enjoying colouring on vellum I have done another card. 

I will be sharing one new card and one card I shared previously on Instagram and didn't get around to doing a blog post.  Both cards have been done with stamping and heat embossing on vellum. Then coloured with Zig watercolour brushes without water.


I generally pick a very dark colour to add at the base of the bloom then use the lightest I have in the same colour range to move the colour around and make different mixes. I also use my  Nuvo Shimmer Brush to add sparkle and remove colour at times if I feel its not light enough.


I
This card isa big bloom stamp from Colorado Stamps and has been silver embossed and I have used a vibrant pink and a purple as the main colours to colour the petals. a light and bright and then olive green for the leaves.

Rather than add to my usual white card base I picked a very pale lilac cardbase and feel it shows the stamped and coloured image to perfection.

 
I use the inked areas to hide my glue behind and adhere the top layer to the card. I also leave quite a bit of extra vellum at the top to fold over and tape at the back.
I have finished this one off with this wonderful 'Dream Big' sentiment which I feel fits the image perfectly and and finally a scattering of cabochon  gems.

This beauty I shared on Instagram  but not here. I love 'The Ton' Big bloom background stamps. They are so crisp and easy to stamp and heat emboss in this instance in white. I have then coloured with a combination of yellow (bright & very light) and orange with greens for the leaves.

Adhered to a white card base that really lets the colours show off perfectly. Only edition to this one is the large gold mirror card 'celebrate'.

I hope you don't get tired of my vellum kick cause I spent a weekend stamping and heat embossing a huge pile of vellum creations.

Thank you so much for coming to visit and I hope you let me know you were here.

Crafty Hugs
Aileen


Monday 19 October 2020

Koby's 2nd Birthday

 It was Koby's 2nd Birthday today and we had a get together yesterday.

It was also Mason's 6th Birthday but as I was unable to see him you will have to wait till next week to see his card.


Back to Koby, after  John made that wonderful climbing frame/rocker for our youngest grandsons 1st Birthday he was inspired to make something for Koby. At 2 Koby was too advanced for the climber/rocker so he thought about a wooden garage for all his cars or a truck he could sit in but as he was at the right age for a Balance Bike he decided to make one for him.


After research, looking at what others were doing he drew up some plans then made the bike. He decided to make it look like a motorbike and chose his own motorbike for design and colouring. John had just finished working on his own bike and spray-painting sections so there was enough colour to do Koby's the same.


Here are the end results.


ooohh thats right I was going to post a card, here we go.

Koby's biggest love is cars, everything is cars, nanny's car, dads car, mums car, etc so it wasn't hard to decide what to put on his birthday card. I coloured all the images in and only had one image on the front of the card and that was the truck.


The red car had 'Birthday' on the numberplate but I changed that to 'Koby'.
In this photo the red car looks a little blurry thats because its on a wobbler and I had just wobbled it.
All the cars were meant to be on wobblers BUT..... the Borrowers decided to nick them all except one lone one. I tell you after wasting nearly two hours turning everything upside down I was no better off so one wobbler.

I used a balloon stencil to add colour then sparkle paste but of course I forgot Distress Oxide needs to dry before adding embossing paste so we ended up with an orange glow to most balloons.


I'm happy to say I didn't let this annoy me, I just kept at it, finished it
and took it over yesterday. Aaron called me to say that Koby thought they were
for him to play with and he pulled them all off, funny the things they worry about.
I was pleased it obviously was interactive enough for him and really
who needs to keep every card you ever get.

Thanks so much for coming to visit and for leaving a comment. I totally enjoy reading the comments as it lets me know people are actually coming to visit. 

Crafty hugs

Aileen


Friday 16 October 2020

Reminder The Flower Challenge #49 Circle/Circles


Time for a reminder post for this months Challenge


Lots of prizes, Guest Designer, new Team Member and a wonderful Sponsor.
All information on these at The Flower Challenge 


I have used one of Alex Syberia Stamps this one called Spring Frame . Ohhh I do so
Love her images and I have purchased many that I need to share if there is just enough time.

In this instance I have used half the frame which I printed up elongated.
One layer is coloured in Cool Grey Copics. I then decided to cut out different size circles with my dies from another print out and these I coloured in Spring Colours. 


I used the slim line dies to cut the  floral image out and then cut the next two sizes up in white pattern paper with shiny silver dots (circles). I added green fun foam to each layer and finished off with the die cut Best Wishes which has vellum layered behind it.

Now I have the other half of the frame that is also coloured so will make another card with that.

I like this style of card which is also called Spotlight colouring.

Thank you so much for coming to visit and I hope to see you again soon.

Crafty Hugs

Aileen


Sunday 11 October 2020

Another card for The Flower Challenge #49 Circles Challenge

 I couldn't resist making another card in reference to 


Its our fourth birthday remember, and we have quite a few prizes on offer.
Come and join us celebrating  four years of fantastic challenges and amazing Design Team and Guest Designers all co ordinated to perfection by Viv.

A team of amazing woman who joined in with this adventure, some leaving to join other teams, others joining us later during the four years. All loved and treasured by me. Their talent is amazing and I have to pinch myself often in wonder at those who have become friends and Design Team members over the years. Also all those amazing men and women who have agreed to Guest Design for us.

I am amazed by the number of Design Teams many on this Design Team are in, and I often wonder when exactly they sleep or eat. 

Thank you one and all, you'r amazing. 
I see the success of the Challenge being due to your talent and all those friends out there in Blogland who decided to follow us and join us with your stunning creations.

Now onto my next card


I do so love colouring with blue Copics for flowers. They just really become eye catching in blue.
In this instance I have stamped this new to use Altenew flower called Statement Flowers and really they truly are.

The petals in blue are in the low range B000 B00 B02 B05  and the leaves in a mix of Cool Grey and Warm Grey. Fussy cutting is really easy on this flower. 
I then used a one inch  width die to cut the circles into the card base. 
I  lightly marked on the inside the four corners of the die cut area, masked it off and then blended with Distress Oxide one of my pale blues just to add a bit of interest.
Three large glittery blue gems and it's finished.


A card for any occassion.

Dont forget to go and check out the challenge over at The Flower Challenge Blog and join us with a card or two.

I'll be back in a couple of days with another card for this challenge.

Thank you so much for coming to visit and I hope I see you again soon.

Crafty Hugs


Sunday 4 October 2020

The Flower Challenge #49 Circles/Circle and a Birthday Celetration

It's a special month this month. Not only do we have a lot of prizes up for grabs but its four years since I decided to try running a challenge.

I can never thank the girls that I approached to be on the team enough for believing in this challenge and me. So much has changed over the last four years, the main thing being I had to take a big step back due to taking on the caring for mum and dad then dealing with not only their passing but the passing of my husbands parents and my best friend.

I was able to grieve and hold onto life due to so many of my internet friends being there for me and we were able to keep the blog going due to the fantastic Viv who stepped up and took over the running, kept everyone happy and designed and beautified  the blog itself.  I can never thank Viv enough for being there for all of us but I can publicly tell her she is totally amazing and she is never ever allowed to quit xx

If you have been to The Flower Challenge first you will find the following information is a copy of what Viv wrote there and you can just scroll past down to my card and the many photos I took to show it off to its best.


It's our 4th Birthday too!


It would be great if you could add our cue card above when entering our challenge.
Of course most of all....have fun!

Lots of exciting news from us this month, sorry if it's a long post!

First more news about our Design Team, as we have had Rachel and Karen sadly leave us recently we  have decided to replace one of them now. Ten seems to be the ideal number we are finding re showcasing etc. Anyway we are very happy to announce that the amazing Loll Thompson from 'Stamping with Loll' is joining our team.

I am sure you will all give her a very warm welcome ;)


Next we are happy to say that we are celebrating our 4th Birthday this month! Whoo hoo!! Can't believe it's been 4 years already. What a super team of talented girls we have here too, they are all just amazing! I am sure you have loved seeing all their fabulous floral creations in our gallery. Not to mention all the inspiration from all of you too! We hope you will continue to share with us in the coming months/years also ;)

So to celebrate we are giving away PRIZES for SEVEN of our lucky winners this time. Our main Winner and to 6 others who make it to our showcase this time also. We have decided to choose our winners rather than using the random chooser thingamajig! 


This month we are being sponsored again by the amazing Alex Syberia, she designs such fabulous digi images. Do check them out if you haven't already and what glorious flowers she designs too!

Alex is kindly giving us a coupon for $10 to one of our lucky winners to use in her store.

Also 'The Flower Challenge' is giving away 6 other prizes to our chosen winners also, see all the prizes listed below.
So the top seven people we choose will each win one of the prizes below. We will allocate them ourselves randomly. If you have any of the prizes on offer already, please state that in your post so if chosen you won't get the same one allocated. Or state which you would like ...but if several choose the same prize you will be given one randomly of course ;)


I have used the Wistful Rose from The Ton I heat embossed on white card stock and vellum in silver.

I cut a circle out of the rose on the white cardstock so I could have the vellum rose
show through from inside the card.

Here you can see afrer watercolouring the rose image with my Zigs all the sparkle that is all over the petals as I used the Nuvo Shimmer to move my colours around. In this photo it looks like I got the silver embossing powder all over the place but thats actually glitter and all the petals look like this but the photo struggled to catch the sparkle.

You will notice here I ended up cutting out the embossed flower on the white cardstock because as usual I never thought about the fact that the coloured image needed to line us with the white card and that made that layer crooked on the card front. Luckily I was able to cut it out without loosing any pieces and matched them up perfectly with the vellum coloured image.

Celebrate is on the outside of the card and inside I stamped
a wonderful sentiment from Pinkfresh Studio
Today is a 
good day
to have a
good day.

Stamped in silver ink and then heat dried.

The vellum rose is fussy cut out and then glued in place. Looks fantastic IRL.

To finish it off I added lots of purple cabochon shaped gems. Who's been watching The Antique Roadshow and loves the way one of the specialists say 'Cabochon' MEEEEEEEE


I really enjoyed making this card and my circle is very obvious  so now its time to go check out what the Design Team has been up to and then join us for our FOURTH BIRTHDAY


Crafty hugs


Aileen