Translate

Thursday, 12 April 2018

'There is no place like HOME' and 'Happy Birthday'


The road trip is all going well. Dad and his sister, Cis are totally enjoying themselves, telling stories from the past and I am recording as we go. With a few hick-ups here and there, though it doesn't matter, because they forget they already told a story and are happy to tell it again. Cis has an amazing memory at 93 for their family history, able to remember names and dates of those who lived near and were related.
Dad's memories are so mixed up now that nothing is accurate but as he talks to Cis the memories just flow, It's so beautiful.
I need to get lots of footage of Cis talking so dad can watch her on the iPad when he's at home and missing mum.   Elysha is happy to sit and listen or watch TV or colour in. I don't think I will get much colouring  done myself, as I need to prompt with questions, make drinks, meals, clean up etc so I think I was dreaming.

By night time and when the nurse arrives at 7 I'm ready for bed too lol. Tuck me in and read me a good night story, ready to start all again the next morning.

But I thought I better post a couple of cards first.


What do you reckon????Aren't these stamps the coolest. I had to have them. They are from Studio Katia  Whimsical Town, I only had time to colour one card before I set off and this one was stamped on Canvas Cardstock and coloured with copics.


So easy to colour with copics, pick two colours one dark one light. Colour with the light, add a bit of the dark then pull out further with the light. Works perfectly.


I used all but one of the house stamps as I saved one for a different card. I stamped and masked and stamped again. There are other filler stamps as well as the tree. I also stamped the sentiment from the
set with includes Your Invited sentiments. These houses are soooo cool.


This is a Lily of the Valley stamp that I have had forever and I was reminded of her the other day. We are always so busy buying new stamps and forget that we have the most amazing, cute, pretty stamps there right in front of us.


I coloured her with my Copic rainbow combination that I can't think of off hand- being away I cant check the combination. But it sure does look pretty and soft and perfect with this little sweetie.


After I finished colouring I added a die cut silver glitter paper 'HAPPY birthday' and then lots of the smallest wee diamond gems to look like little rains drops.


Challenges::

There is no place like home - Copic colouring


My little fairy is all about celebrating your birthday.


There is no place like home


Happy Birthday


Happy Birthday


There is no place like home


Thank you so much for coming to visit and I hope you come again soon.


Tuesday, 10 April 2018

Celebrate Your Birthday


This week I will be posting random cards that I have made and coloured over the last week or two, not for any particular challenge but rather because I felt like using the stamp sets or backgrounds I had made.

As of the time of posting this I am setting of on a journey with Elysha and my dad. We are going to visit dad's older sister (only by a year). Cis is 93 and lives independently, cooks and looks after herself and even babysits the grandchildren and great grandchildren at times. She has a great sense of humour and remembers their early life on the farm and in the hotel when they were children so well. She was always the one who would tell us stories about dad that painted a very different picture to that which dad tried to present to all us children (so pure and do no wrong).

Now as his memories are so quickly disappearing and are so very jumbled up I decided to break the monotony of his days. He pines so much for mum, sitting at the large windows looking across at the cottage that she now lives in, hoping that she will come out and wave to him, and not realising that unless my sister or I are there there is no one to bring her out as she has no memory of him.

He rings me up to 20 times a day forgetting he has called or just to tell me he is going to see what is going on. I decided there was no time like the present and decided to organise a trip. I hired a car, organised the staff to get his medication, oxygen etc ready, cancelled Elysha's program and pickup for a week, booked motels with disability accommodation, nursing support and found the most amazing bunch of people in every area I came across all going out of their way to do all they could to help me get it organised especially as I decided to do it only four days ago. The journey will take 8 1/2 hrs so will be broken with an overnight stay on the way. Then three days with his sister and her family then two days to come home.

Now this long explanation means I will have colouring stuff with me to do at night as he and Elysha sleep if I still have the energy but nothing for making cards so I will post cards I have made.

Todays card is my first. And I have to say my favourite, I absolutely love how this background turned out. Multimedia cardstock. I now have more Distress Oxides so more colours to play with.


Bright rainbow colours blended here and there. Then flicks of water. I then stamped this amazing 
The Ton peony bouquet and masked it and added the vase that comes with it. 


I coloured with pencils and added lots of white to highlight each time using a darker colour one way and a very light from the other direction then bringing in the white to lighten..


I added white pencil to the vase to define the glass look. I did try copic at first and copic shadow but it just didnt work with this piece. There is some shadow evident at the base on the right in the vase but the pencil picked it up better. To finish the piece of I added a very fine line of gold washi tape each side and a gold mirror card diecut 'celebrate' and inside 'your birthday'

I love this set and cant wait to copic colour and watercolour and also colour without the vase and ohhh isn't it lovely!!! I totally enjoy their stamp sets.


Challenges


I do believe my colours scream it all
BOLD


I have gone without the vellum twist.

Monday, 9 April 2018

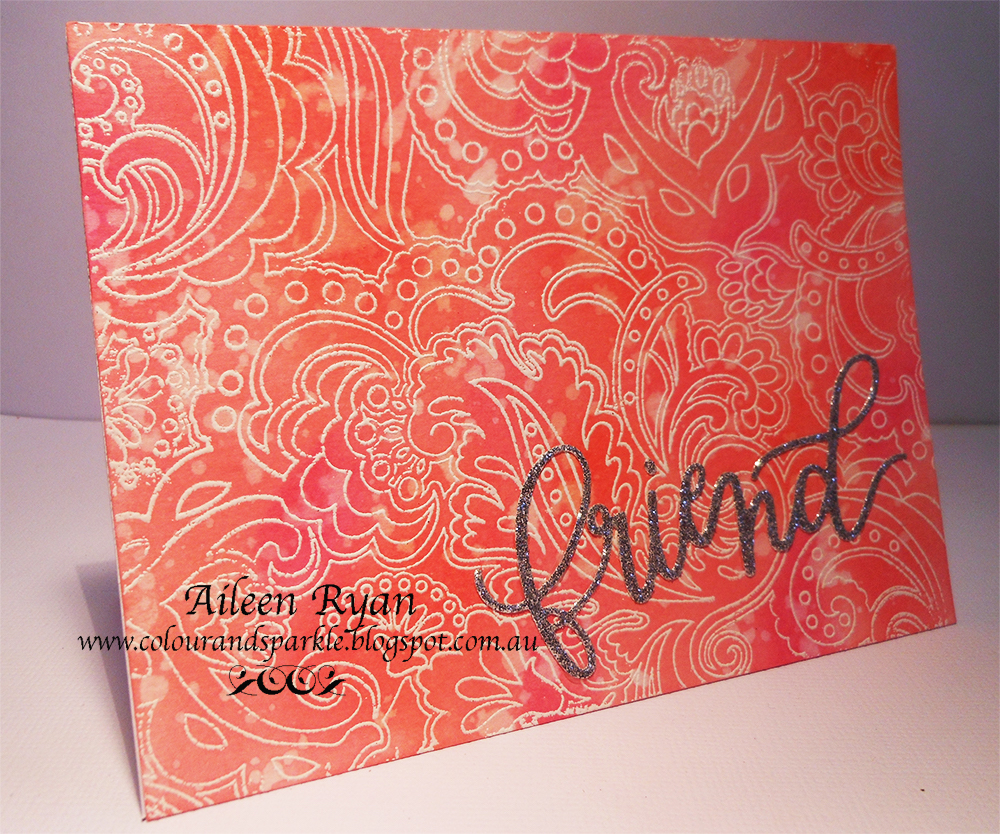
Friend


 I was inspired to make this card after seeing Anita's card for the 
Muse Card Challenge.

Yes I know look at her beautiful card then mine and say to yourself well were is the inspiration.
The inspiration was the beautiful pink colours and though Anita's card is stencil I decided that as I don't have any large floral stencils I would look at white embossing. Full large floral and different tones in the colours themselves.

I used Distress Oxides all the pinks  and it looked wonderful and soft and I kept the brighter pink to a minimum but it has turned out more orange/pink. That flamingo pink or frangipani pink.


I even flicked water here and there to lighten the colour even more. This wonderful background was a gift from Michelle from Handmade by Michelle This is a Hero Art Background that has been discontinued and I love it and the 'friend' sentiment is from the March Hero Art kit.

I have to leave to your imagination. I pictured it, I loved it when I made it but when I am looking here I am not so sure. But it will make a wonderful card for a friend. 


It's last minute of course, made earlier today but then left till after  Kindergarten readers are read,
cuddles and kisses are finished and finally Im allowed to have  computer time. Nothing like one hour and counting.


Thank you so much for your inspiration Anita, even if I went bit 
off course it started in the right direction.


Its a favourite technique, well one of many. I love heat embossing
and blending. To me its CAS as its very simple, stamp, 
heat emboss and blend some colours. But I don't know if CAS means
lots of white so if its wrong in that sense my apologies I will remove.


White Heat Embossed


White Embossing Powder, The discontinued Stamped Background
and the new 'Friend' sentiment.Love it.


Thanks so much for coming to visit and I hope you come again soon


Thursday, 5 April 2018

The Flower Challenge #19 A Shaped Card


A new month a new  Challenge, new Design Team members and lots and lots of photos.
Just so your ready for it I have added lots of photos so you could see the steps for making this Pop  Flower Box just incase you have never made one.


Now I don't want the fact that its 'A  Shaped Card' Challenge to send you scurrying to the hills and ducking for cover ok. I know I tend to see this title and then skim the rest but I have discovered how easy peasy this can be having seen what the Design Team have made and I just have to share and inspire you ok.

But before I start I want to welcome some brilliant new talent to the team. I have to say that choosing who was going to join us at The Flower Challenge was one of the hardest decisions I have had to make in quite some time. I could not believe the amazing number of ladies that submitted cards and  asked to join us. It made it so so hard to decide and I don't want anyone thinking this was an easy decision and that because you weren't picked you weren't good enough. If you weren't picked it was because we just couldn't take everyone and we hope that if there comes a time later when we need more Design Team members that you will consider reapplying.

The talent out there in Blogland/Facebook/Instagram is just amazing and everyday I see so much talent I feel as though I am surrounded by gifted and talented artists/creators who are all willing to share their talent with us.

It was so hard actually that we ended up deciding we needed three new team members and they are over on The Flower Challenge waiting for you to go visit,  after you have finished looking at my creation of course.


First off I have taken a photo of the Pop Open box I have made and next to a card so you can get an idea on proportion as I have always looked at these Pop Open Boxes and thought 'wow how much card stock must that take' and 'big envelope thought' when actually it is quite small. 


First thing I did was find a couple of video's on YouTube for easy tutorials.
Here is the link for one. its easy to follow and you can always check out others from there.
I made a paper template first so I could keep it to refer to later with sizes etc. I'm not going to worry about getting into measurements etc as you can get that on the tutorial and they  can differ slightly and also it depends on inches and centimetres etc.


Here you can see I have put the box together. I did as suggested and added tape to the little tab then folded the pieces in from each side to make sure it was a perfect line up.

When I did the little pieces for inside I added two pieces but you could add three if you wanted or four but could get a bit crowded. Anyway when I did my folds each end, I folded in opposite directions not sure if it makes a difference, but thought it might help with flexibility!! I then placed inside the box with tape but then folded the box flat to attach the tape as I found this made them attach better and without bulk or lumps in the card when folded flat.


See here, not too bad. ok. 


Since I was adding flowers to the box I decided to add pattern paper with leaves to the three flaps and the one at the back to reinforce and make it stronger so it stands up I added pattern paper the full length so decided to make it look like a bamboo fence/wall.

I then cut up a pile of strips of acetate for the flowers to get added to. I keep the pieces that are always on the backs of stamp sets as they come in so handy for shaker windows or watercolouring or now pop open boxes.


I then had a look through my wee little flower collection to see what I wanted to use. 
Ohhhh I do love colour.


  These are all from 'My Favourite Things' 'MFT' called Fancy Things and I loved colouring them.
They do have dies but I cut them with the Scan 'N' Cut but I have also fussy cut and they are very easy to cut. Anyway back on track I attached with ease to acetate and a few little ones on the card flaps amongst the leaves.


As I went I practiced  folding the box which is a good idea so you can keep track of
a) when there is enough added.
b) if there are too many added.
c) if there is too much protruding and you meed to remove or move.


I added a few other little flowers from a few other companies as well as I wanted a bit more colour and some tiny flowers I didn't have in the collection from MFT.


I love all that colour and it doesn't need any sparkle other than the gold die cut 'happy birthday' added to the front flap. All finished and met family approval from all.

Any questions, more than happy to answer but now its time to go check out what the rest of the team have done and I can tell you its just brilliant. So don't hang around and no nicking off to do anything else.........go on.......The Flower Challenge


Thank you so much for coming to visit.


I found a couple of challenges just perfect for this card:

Couldn't ask for a better birthday card than this
to celebrate their 9th birthday. Happy Birthday
Simon Says.


Anything Goes this time -no topping.


Monday, 2 April 2018

Love So Special


Here I was sitting at home nice and relaxed and thinking I have my card done for the Muse challenge a day ahead hows that for organised. But then of course my son rings and says 'What time you coming over tonight mum?' 'What for?' 'Babysitting!!' Ahhh the penny drops Easter long weekend its Monday not ahead at all. Better get in and post this card before the gates close.

The grandchildren are not amused having to share attention with the computer but what can you do, there are priorities. 
Look at this amazing card Barb has done. She was Guest Designer at Muse for the week and of course has inspired some brilliant cards. I wanted to do an exact copy actually as I have the flower die and those colours are my all time favourite combination together with the leaf colours. That grey with white dots so elegant, the silver 'love' the fabulous scalloped die cut and clear sequins could have been a card made to order for me. 


My inspiration is obvious: The dots in the bottom half; the love die cut; the stamped sentiment;
the die cut edge; flowers; sequins.

I went white pattern paper with gold foil dots. Used a edge die cut for the frilled stitched look. I actually went into my die cut storage about a month ago and removed all my edge dies which added up to about 15 different types and brands and put them all in a hefty coffee mug near my cutting machine so they are always in eye view. Great way to remind myself that they are there and that they can fix an error or finish a card off nicely.

The flowers are Altenew coloured with Copics. I have darkened the picture a bit here so you can see the sparkle. I bought some spray sparkle from Hero Art. I just squirt into a little cup like a medicine cup and brush on to my cards. Gives great sparkle and can be easier than the wink of Stella.


The Copics used were R81 R83 R85 R89 sorry cant remember the greens as I grabbed a mix of leaves here. Die cut the 'love' in gold mirror card. Bent the 'so special' on the Misti so it went along the line of the stitching (worked extremely well and perfect for if needing re-stamping).
Finished off with some sequins (boy I hate trying to place those suckers).
Barb cant thank you enough for the wonderful inspiration.


Lets see if I can find some more challenges for this card of mine. 


Colouring is my favourite technique with Copics most of all.


Sunday, 1 April 2018

You Make the World a Better Place Just by Being In It


I have started colouring in my collection of wonderful stamped images from my latest purchase from Stamping Bella. Oh my goodness they are so cute and I have found this wonderful rainbow mix of Copic colours in soft pastels that just rock together.

Check out this blend going down my unicorns horn and flowing on down the mane.


Then right on through the tail and out the end.  So my colour mix is
YG01 Y000 YR000 R10 V01 BV01 B41 B000
I do the colours once dabbing into each with the next then I start again going slightly lower with the colour so the blending is smoother and the colour transitions better.


After colouring Bernie and Rosie and stamping the sentiment I was going leaves a CAS card but of course I had to go and damage the top of the card. To fix it I cut out the image with my die then looked through my pattern paper to find something to use with Bernie and Rosie and found this paper.

Talk about perfect.  I  went bigger than my usual card size as I wanted to make sure you could see the pattern properly and to full benefit. The card is 5.5 x 5.5.  I fell in love with it straight away. It looks like I coloured those rays to go with Bernie's colouring.


Challenges:


Another new challenge for me to try out.


Thank you so much for coming to visit and I hope you come again soon.