Translate

Friday, 22 January 2016

You're one cool chick


This young chick has attitude but I just love using her image. Its so cute and perfect for a young lady turning thirteen. Coloured this image with Copics

and decided to go with pink streaks to match the pink and orange outfit. Glossy Accents on the boots straps, zip and studs on jacket.

Cut layers with the rectangle die with dots, one layer the image and one layer pink dots. Then attached these to an orange cardbase.

Stamped on 'You're one cool chick' and added a couple of mini square gems and an enamel heart.

Nice and bright as per request. Then I cleaned up the million and one little dots that were stuck everywhere from the die cut. Really enjoy the look of the die cut but hate those little dots especially the ones I missed, that then imprinted onto the next card I did (what are those little indents thinks I.....only took a short time to realise :).

Okay now to enter this in:


Thanks for coming to have a look, hope you come again soon.


Wednesday, 20 January 2016

Surprise


Before I begin my post maybe someone can tell me what I did wrong on my blog here. I had a photo of myself with the two girls and a basic about me description and now its gone and I have an older photo with G + and no description. Yes I as fiddling around in settings as I was trying to add a button and now I cant get back what I had......I realise it has probably gone to the ethernet never to be seen again but if anyone can tell me how to put back the photo and get back that basic info I would be very grateful.

Okay now onto the reason you are here.


I love Stamping Bella stamps. If I could I would own them all. They are so cute and so easy to colour and always look brilliant. Check out this little cutie potutti (made up word!) I have gone bright but not heavy with the colouring here. Also experimented with doing my balloons lighter so I could show balloon behind (even when I end up with five balloons and only four strings....magic mmm). I need to practice this technique but was really pleased with the end result.


As usual Copic colouring. Don't you love those tights. And I added Glossy Accents to all the flowers so there is a nice accent there.


This ends up being quite a long image so I cut the pink cardstock with my largest die with scallops attached the coloured image onto the pink cardstock then attached both to a white card base.

For my sentiment I wanted to use the die cut 'Surprise' as she is dropping in on the party so cut that from white glitter paper and finished off the card with a few little enamel dots that I did in a mix of colours to go with the balloons.

Entering this in:

This is my third entry in this as one I added previously is not eligible as its not stamped so I get to go again.

Think its too busy and too many layers for clean and simple so I'll skip the topping


 Hope you like what you see here and come again soon.


Do you remember the card I did on Monday 18th January all yellow and dots and the sentiment
 'you are my Sunshine'.... well check out this challenge and tell me its not ironic


Okay before you go here are a couple of photos of myself with my two girls. Jessie's visiting and she and Elysha are always taking selfies and posting on Facebook. Jessie nagged me to participate so as you can see we had a bit of fun and now I have some wonderful photos to show mum and dad.

Now to work on the boys.


Tuesday, 19 January 2016

29 Again?? Talk about recycling!!


Love the sentiment and love this digital image. This is Stella and she is from Bugaboo Digi Stamps.
I have a hugs number of their images, remember the girl in the champagne glass Christmas image, she's another. My favourites are Stella and Gus, they have perfected grumpy old men and grumpy old women. They have sarcasm perfected to a T. Of course you don't have to use the sentiments, can just use the stamp. They have so many images to pick from from baby to old to floral etc. They also have a free weekly image, sales and discounts and support many challenges you see on Blog land these days. Really worth a look and no I am not connected to Bugaboo or receive anything for suggesting this its just a shared thought.


I print these up on my laser printer which means I can colour straight away with copics and the ink doesn't smear. If I use the Inkjet printer then I tend to leave for a few days to let the ink settle in and just take more care when colouring.

So as you can see here I have coloured with copics. 


I decided to put this image on a blue card base as it worked with the blue I had used to outline on the sentiment, ball etc. Added apiece of patterned paper then  decided to die cut the image.

Struggled then as I felt there was something missing and went with a few material flower stickers that I had bought who knows how many centuries ago and was saving for something!!!!!

Anyway ended up quite happy with this and would like to enter in:

I think this is what they mean.


Okay thanks for coming to visit and I hope you come again soon.


Monday, 18 January 2016

You Are My Sunshine


This is my second post for today, no more I promise. Really easy card that I had an idea for so decided to go with the flow. Card base masked off at the top fold then I blended my Tim Holtz Distress inks, Lemonade, Mustard and Fossil. Kept it very light at the bottom. once I was happy with the blending, I added an acetate top that already has all the white dots on it - easy peasy.


I then added the die cut sentiment 'Sunshine' in silver glossy card stock . Once it was dry and secure on the acetate I stamped 'you are my' in Stazon black ink. Boy that stuff has a strange odour!!! The stamping looks very light but is actually quite clear IRL.


I secured the acetate by folding at the top with a bone folder and then taping onto the back of the card. Its just a small overhang. A perfect card for another hot as Summers day,.

This is a really pretty and easy card and a great way to practice your blending if you don't feel you are getting it right. The acetate I bought came in a number of different colours and dots as well as stripes so could make a nice set.

Okay time to get this into a challenge or two:

definitely ombre  

This was left open to our interpretation so I see that as whatever we would like to 
add that is Clean and Simple. This card is my interpretation of OPEN.

Thats it for now so thank you for coming to visit and I hope you come again soon.


Get Well Soon


I love when I have tried another thing and can mark it off my 'To do' list.

Not only have I done no line colouring but I have managed to use another stamp set that have been calling to me. Of course I need to continue my use of them but finally got them out of the PACKET and INKED them.

I masked off a panel and stamped the flowers and leaves then coloured with copics. I wasn't sure it would work at first but am happy with the end result. 


After colouring I added white gel pen for centres and some clear Wink of Stella that became a bit more than some when it decided to blob out on one flower but it ended up shared throughout all the flowers and has quite a nice little sparkle now. Also added some little clusters of three dots as I have seen done before and think its a great way to balance things out.


I finished off by adding two very thin cuts of black card stock and stamping this very cute 'Get well soon' sentiment (another never used before, new from Clearly Besotted 'Sweet Little Sentiments'.

All done (dying to add some gems but best not for the CAS look. Maybe later.

Okay all ready to go to:

Just scraping in under the wire, not a great way to show off a card, I know but its....me.


This is Anita's card and I took inspiration from the black strips, flowers between the black strips and the 'get well soon'. Love her card and enjoyed entering this challenge.

Would also like to enter:


Previously entered a card and then of course, silly me realised
 it wasn't relevant for this challenge because theres no stamping.
This card however is all stamping so thats cool.


Thanks for coming to visit and I hope you come again soon.


Saturday, 16 January 2016

Celebrate, it's your day!


Well I'm amazed to be posting this card I tell you. It started out as a partial print out of a digital bouquet of flowers from 'Power Poppy'. I coloured it in with Copics and was very pleased with the end result.


As you can see here the flowers are so pretty. I decided to put on a purple card base but first stamp a sentiment.


Then everything went downhill from there. Stamped a little sentiment and it just looked wrong. The stamp has become spongy so some of the sentiment was nice and clear and some squishy, fat, blobby so I decided to do a new sentiment and work out how to cover the original and make the additional look ok.
First replacement was too long and had to hang over, no good. Second one was okay but as I was checking how it looked I put a big blob of black ink from my finger right above the flowers.
Sooooo I then cut the flowers at an angle with a die but had to cut close to avoid the first stamped sentiment and the black blob. THEN I commenced to cut four versions of the other cut panel to fit properly with the first one, you know how it goes, wrong angle, and again, too thin one side blah blah blah. As I was about to throw the whole thing in the bin I decided one more go, got it and decided it would just have to do.


Its a bit...... different, but it works. I'm happy with it love the sentiment 'Congratulations' die cut with the little message 'It's your day!' and finished off with 3 little acrylic dots.

Would like to post this to:

Seize the Birthday (the Topping is CAS but think I'll have to pass on that bit today)


Okay thats it for today. Thanks for coming to visit and listen to my story of disaster.
Hope you come to visit again.


Tuesday, 12 January 2016

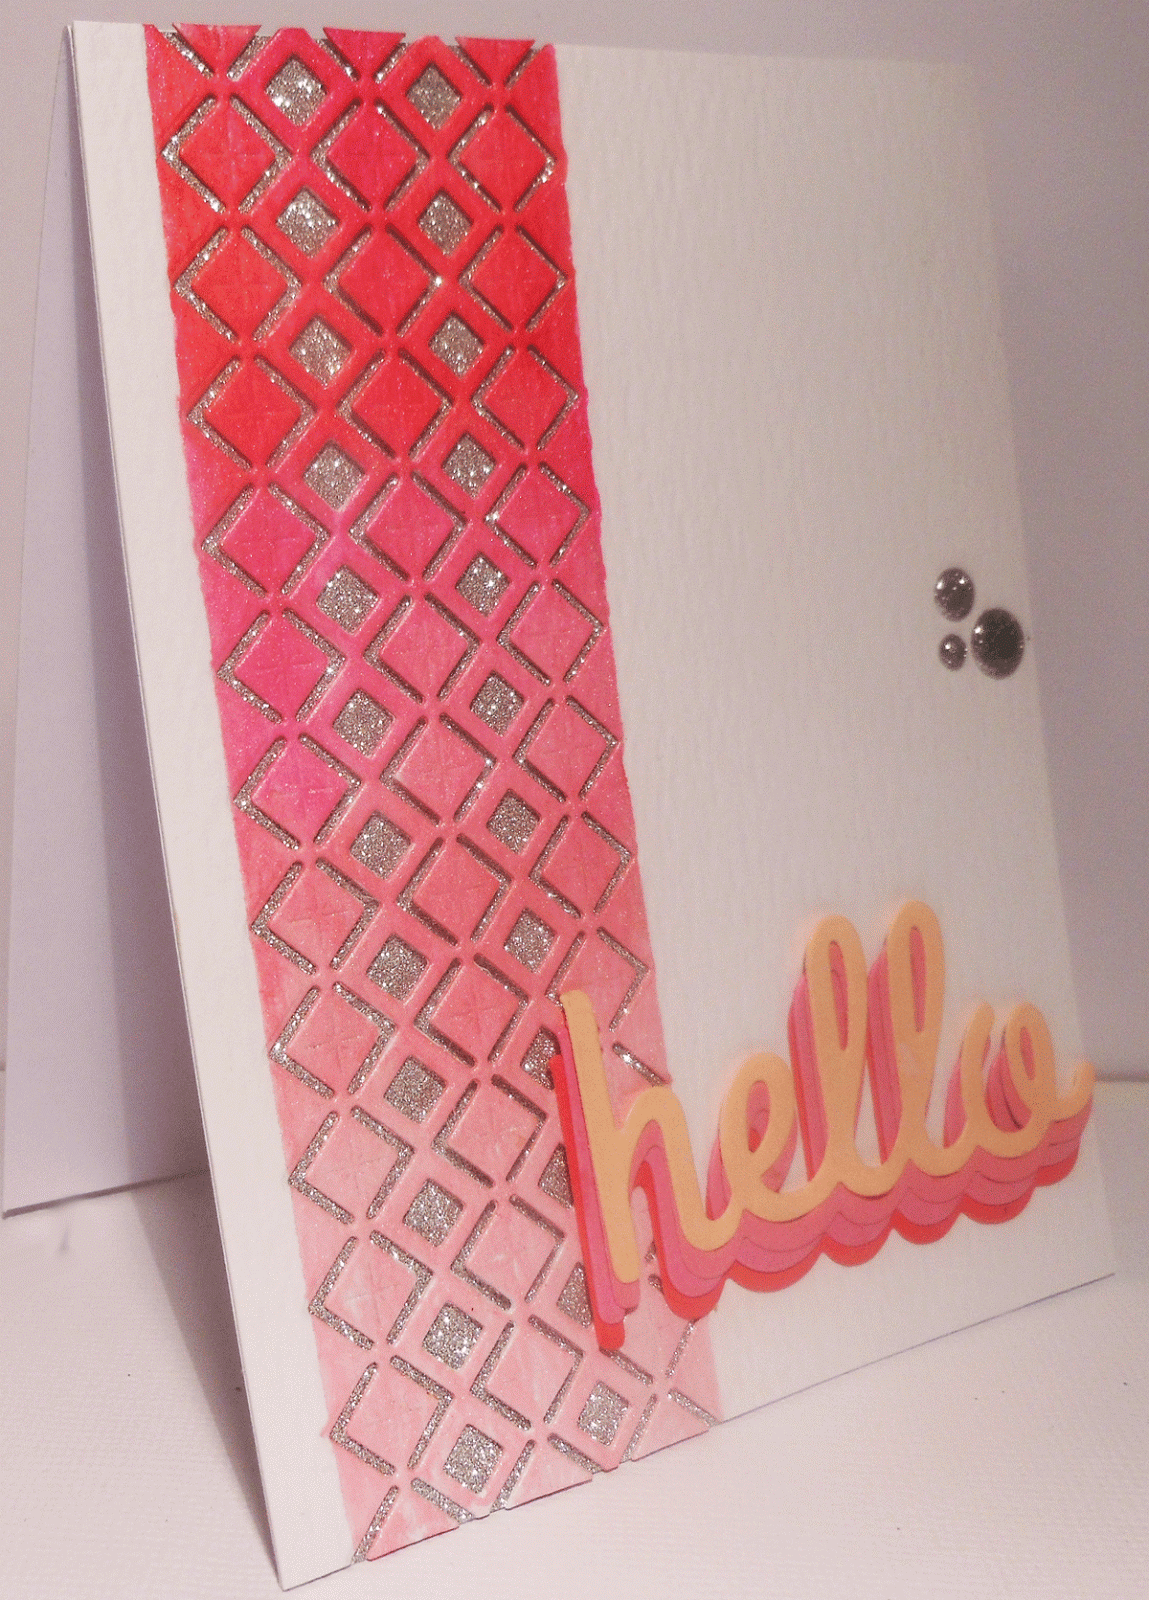
Hello, hello, hello, hello


I just had to think of what would get you interested, four hellos, well thats as many as I used on this card, ok!!

Had an idea but went a bit south and wasn't quite what I was looking for, but got this look and I'm happy with it.

First I die cut a piece of watercolour card stock then I got three of the Distress Inks in pink, smooched onto my paint pallet then sprayed with shimmer mist. used a paint brush to add in sections and blended the darker and lighter ink for an in-between colour so they all ended up blended very well.


If you click on this image you can see the shimmer in the colours. I used tape each side of the die cut to make sure no watercolour ended up elsewhere on the front of the card.


I then attached a piece of silver glitter paper just under the die cut section to make the whole panel looks beautiful and sparkly. mes 

Die cut 'hello' four times out of different pink colours and glued them so they sat just above the curves of the previous one.

Finished the card off with some sparkly silver gems.

I would like to end this in:


Edit:
Decided to follow Cornelia's advise and enter this in the 


Thank you so much for coming to visit and I hope you come again soon.


Monday, 11 January 2016

Happy Birthday & Thanks

I'm doing two cards in this post as they share the same items,slightly different in layout and different sentiments. Lot of photos in this post as I decided to take some photos as I progressed and share incase anyone else wants to do the same idea.


'Happy Birthday' card 


'Thanks' card


These two cards came from one base. First I blended three pink Distress inks onto cardstock.


After I had die cut the shape, I used some Press N Seal to keep all the little pieces within the frame of the die cut. I then added little pieces of tape to all the little pieces of the die cut.

I removed the cover on the double sided tape on only some of the pieces. Flipped the piece over onto a card base and the pieces with the double sided tape uncovered stayed on the card and the others stayed on the Press N Seal.

I then peeled off the rest of the tape covers, flipped the whole piece and again pressed down onto a card base.


Here you can see the card bases for two cards and the negative die cut that I will use on another card. Each card has the pinks going up in gradients of intensity in colour but don't look overwhelming.


Finished off with a gold glossy cardstock 'Happy Birthday' and 'Thanks'.

I would like to enter these in:

Thanks card


Happy Birthday card


Happy Birthday Card

Thanks Card

Happy Birthday Card

New Die used Thanks Card

Thanks so much for coming to visit and I hope ou come again soon.